Last Updated on September 3, 2025 by
DELL PROCESS
The process only works for Dell laptops that can use Legacy Boot.
Tools
Dell Asset Tag Utility USB Drive.
How to Use Dell Asset Tag Utility
Plug the USB drive into the laptop.
Power on the laptop enter the BIOS and make sure the Legacy boot is turned on.
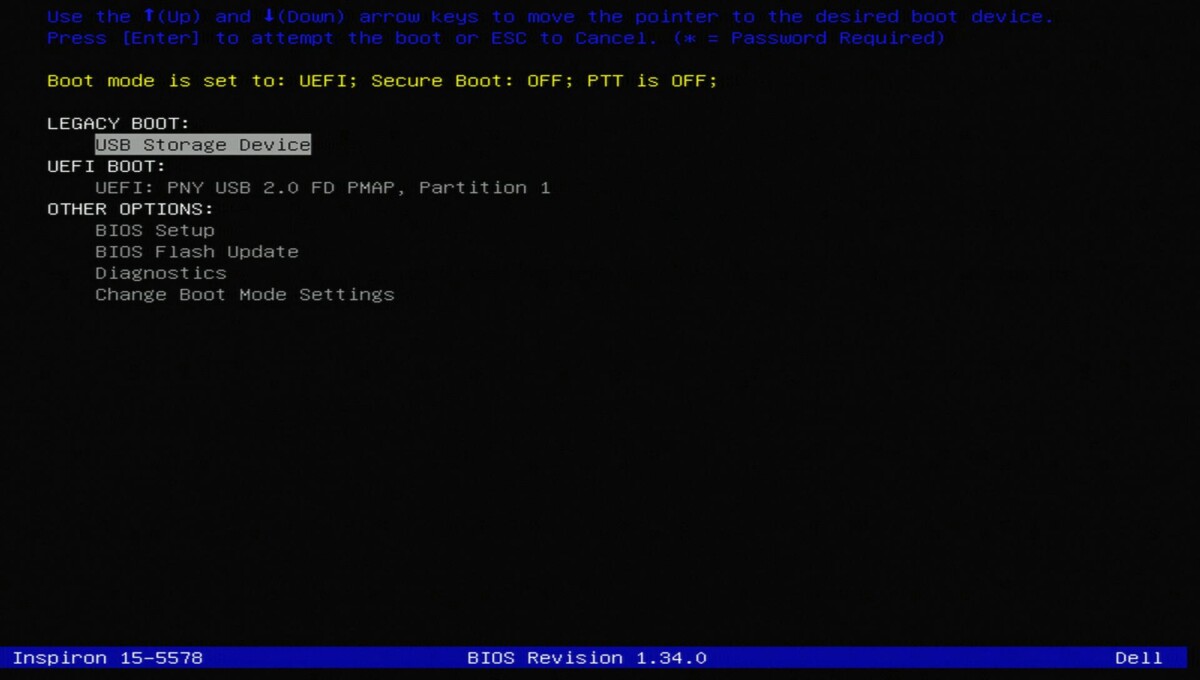
Boot to the USB drive by using the LEGACY BOOT
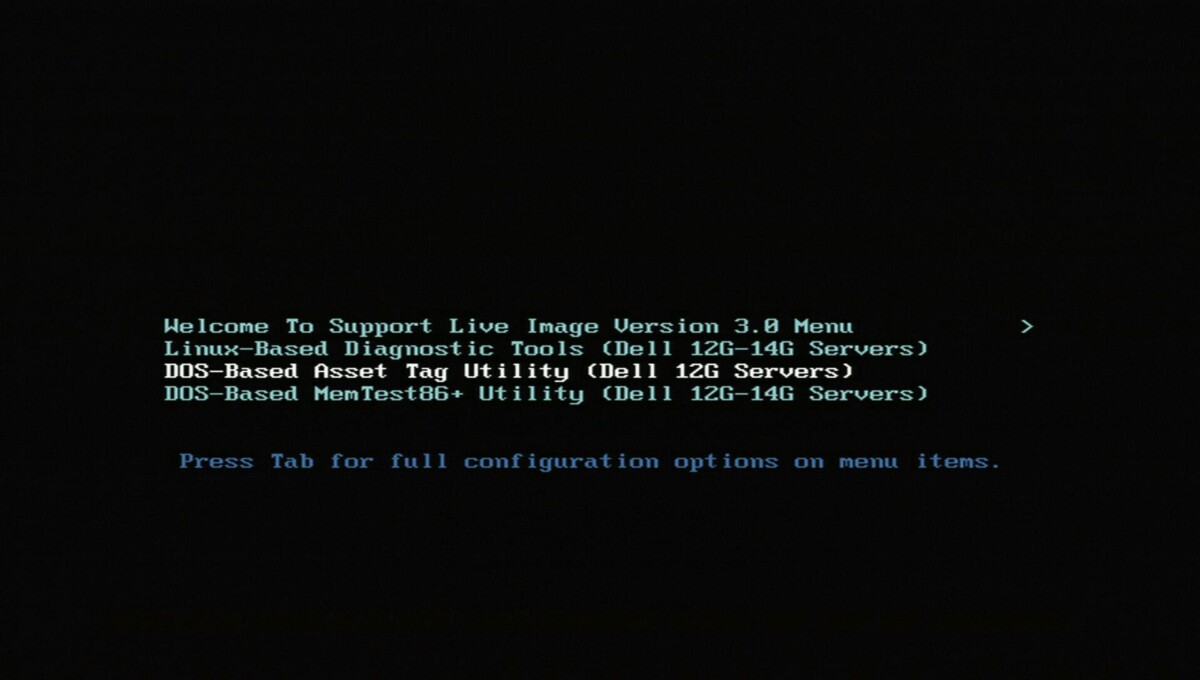
When the menu is loaded, choose the DOS-Based Asset Tag Utility (Dell 12G Servers) option.
Hit any keys when the option is loaded.
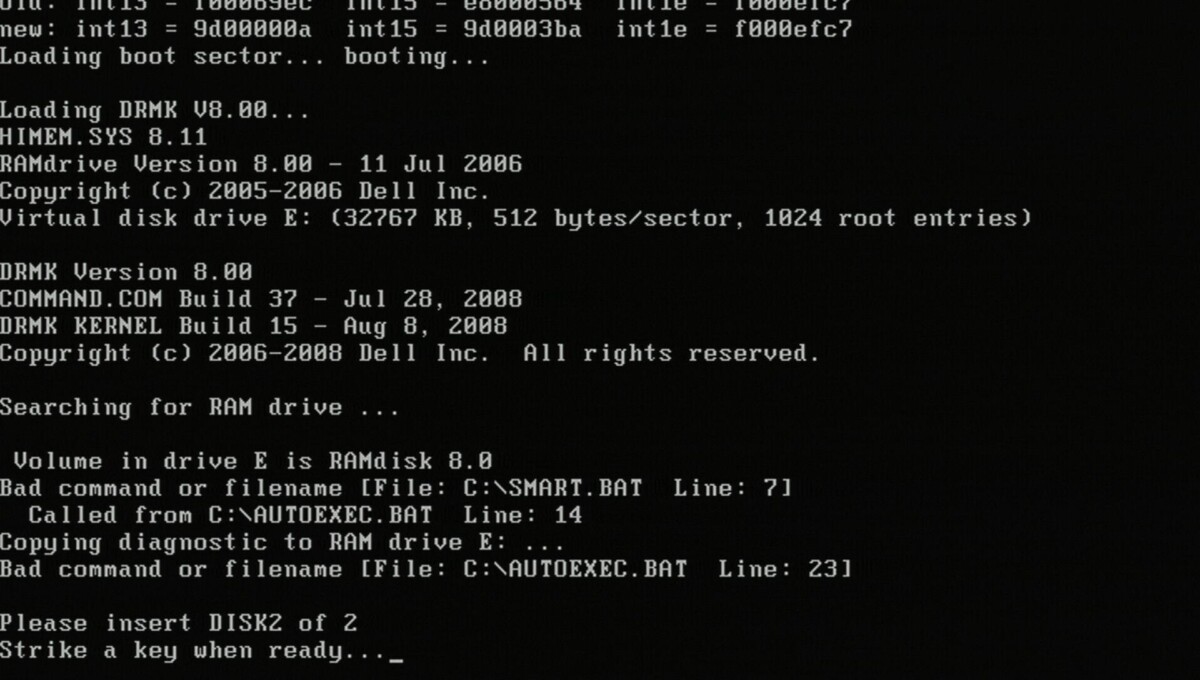
In the Command Line enter C: then press Enter.

At Diag C:\>, type CD UTIL then press Enter.

At Diag C:\UTIL>, Type Asset /O /D then press Enter and Y to delete the owner tag.

At Diag C:\UTIL>, Type Asset /D then press Enter and Y to delete the asset tag.

LENOVO PROCESS
Boot into your Hiren’s Boot CD that should already have the asset removal tool loaded onto it.
The Lenovo asset removal tool should be named lenovoasset.exe and on the root of your Hiren’s USB.
Load into command line within Hiren’s and will type in this code:
y:lenovoasset.exe -set “USERASSETDATA.ASSET_NUMBER= “
You will be asked to confirm changes if the process went as planned. Confirm the changes and wait for the command line to allow you to start typing again to verify that the process has completed. Be sure to check the results in the BIOS afterward to make sure it actually removed.
Two things to note: the y: drive might be a different letter. This is your Hiren’s Boot CD USB drive. Change the letter if necessary. Also, note that there is a (space) after the = and before the ” so in other words you are simply changing the asset tag to a space key.
Please let Andy or Ze know if you encounter issues and if more process needs to be documented.

Records of Revisions
- — ZeDong: Updated post "How to Use Dell DOS Asset Tag Utility and Lenovo Asset Utility to remove Asset tag and Owner Tag"
- — ZeDong: Created post "How to Use Dell DOS Asset Tag Utility and Lenovo Asset Utility to remove Asset tag and Owner Tag"




Read Edmundo Sanchez 03/17/2026